When Sheila explained the Drawer-A-Day concept to me last year, I got it right away. Sheila defined "drawer" as any space where one might store things...an actual drawer, a shelf, a basket, a barrel or a bin. But here's my dilemma...my desk.
The top of my desk is constantly covered with work that needs to be done right away, work that should have been done yesterday, work that should be done sometime soon, work that I don't feel like doing, work that I don't know how to do, and work that I refuse to do. That means that I have a daily opportunity to clear off my desk. My attempts to do that have been futile. I can power through the jobs that have to be done and clear out that debris. I can throw away the jobs I refuse to do and gain some space there. But all those other categories are still hanging out there.
That red thing?...a Christmas stocking. How am I supposed to keep things organized when people are mailing me Christmas stockings in August? I've given thought to how to sort it with "in" boxes, file folders and other organizing gizmos but I can't seem to make them work. So my strategy is to clear off one side of the desk, make a pile of work on the other side and step back and admire the side that is clear. It works well as long as I don't look to my left.
So here's the question: Is a desktop a drawer?
Tuesday, September 3, 2013
You know the Drill
I like a lot of things about September. One of them is the start of Drawer a Day season. Getting a bit more organized won't help me lose weight, clear up my skin or improve my finances, but it makes me feel I can control something.
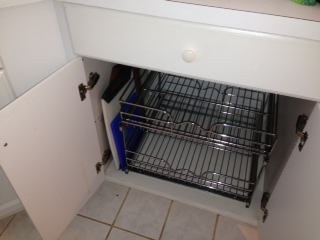
This year, September began on Labor Day weekend at the beach, so I tackled a cabinet there. I am overly proud of myself for having installed a Rev-A-Shelf two-tier drawer thingy in an otherwise somewhat useless box of a cabinet. This required me to operate a drill.
This is a drill
Jim owns a drill, but being Jim, he keeps the pieces of the drill in several different places, so step one was to find them. Step two was to charge the drill. Step three was to take my picture with said drill.
I started with this:
and this:
And ended with this. Note my intentional installation off-center to allow room for items on the side.
Now that I have mastered the drill, I can take this show on the road. Happy September!
Subscribe to:
Comments (Atom)


